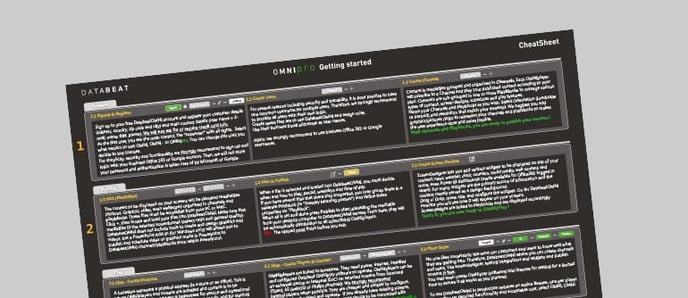
Are you interested in getting started with digital signage and DatabeatOMNI? Great! We have created this cheat sheet to get you up and running with your digital signage in no time. Just follow the instructions, and you are set.
If you wish to download our cheat sheet in a PDF, you can get it here.
Prepare
Step 1: Signup & Register
Sign up to your free DatabeatOMNI account and register your customer details (address, country, zip code, and city) and main contact details (user name = Email, name, title, phone). We will not ask for or require credit card info.
As the first user, you are the main contact, the "superuser" with all rights. Select what version to use; OMNI, OMNI+, or OMNIpro. You can change this until you decide to buy licenses. For simplicity, security, and functionality, we strongly recommend to sign-up and login with your business Office 365 or Google account. Then, we will not store your password, and authentication is taken care of by Microsoft or Google.
Step 2: Create Users
For several reasons, including security and traceability, it is poor practice to have one common username for multiple users. Therefore, we strongly recommend providing all users with their login. Create users that are to use DatabeatOMNI and assign roles.
Use their business Email addresses as user names. Again, we strongly recommend using the business Office 365 or Google usernames.
Step 3: Create Channels
Content is media files grouped and organized in Channels. Each OMNIplayer will subscribe to a Channel and play your published content according to your plan. Channels are sub-grouped in one or more PlayBlocks to manage various types of content, screen-designs, schedules, and play features.
Name your Channels and Playblocks as you wish — select Orientation (Landscape or Portrait) and resolution that matches your screen(s). We suggest you add graphics/pictures /logos to represent your channels and playblocks to makes the user experience more helpful and more enjoyable. With Channels and Playblocks, you are ready to publish your content!
Publish
Step 4: Chose media files
The content to be displayed on your screens will be standard media files (Pictures, Graphics, video, even webpages) organized in channels and playblocks. These files must be accessible from your PC or MAC. Click +, then locate and load your files into DatabeatOMNI.
Make sure that media files fit the selected screen format (aspect ratio and overall quality). DatabeatOMNI does not include tools to create and design graphics and videos. Still, a PowerPoint Add-In (for Windows only) will allow you to publish and schedule video or graphics made in Powerpoint to DatabeatOMNI channels/playblocks from within Powerpoint.
Step 5: Plan & Publish
When a file is selected and loaded into DatabeatOMNI, you must decide when and how to play; period, weekdays, and time of day. If you have several files that share play properties, you may group these in a separate Playblock (ie, "Tuesday Morning posters") and define these properties on "Playblock."
When all is set and done, press Publish to start uploading the media file from your desktop computer to DatabeatOMNI servers. From here, they will be automatically distributed to all subscribing OMNIplayers. NB: The upload must finish before you exit.
Step 6: Create Screen Designs
ScreenDesigner lets you add various widgets to be displayed on top of your content; news, weather, clock, counters, social media, web content, and more, even Power BI dashboards (made available for Office365 logged in users). For many, widgets are the primary source of information, and the content merely serves as a design-background.
Drag n' Drop, move, size, and configure the widgets. On the DatabeatOMNI monitor, you will see how it will appear on your screens. Screen designs are linked to Playblocks and are displayed accordingly. That's it, and you are now ready to (OMNI)Play!
Play
Step 7: Create locations
A Location represents a physical address (ie, a store or an office). This is where OMNIplayers and screens are installed, and the content is to be displayed. The location address is essential for service and operational purposes, for automatically selecting local weather info, and for starting and stopping screens to save power (OMNIplayers follow Location service hours).
If you want screens on any other location than your registered customer location, you must first add the location and then add (link) players to it. We suggest you add graphics/pictures/logos to represent your locations; it makes the user experience more excellent and more enjoyable.
Step 8: Create Players & Licences
OMNIplayers are linked to locations. They need power, Internet, installed and configured Databeat OMNIplay software to operate. OMNIplayers can be an external device or internal (SoC) on selected screens from Samsung (Tizen), LG (webOS), or Philips (Android). We strongly recommend internal players when possible.
They are more affordable and simpler to configure, install (no signal cables) and operate. If you already have existing screens, use Databeat OMNIplay3, an affordable Android device, to be connected with HDMI. Order players and licenses directly in DatabeatOMNI or through a Databeat partner. They will ensure that everything is delivered with your content, ready to use.
Step 9: Place Order
No one likes uncertainty. We want our customers and users to know well what they are getting into. Therefore, DatabeatOMNI, where you can create channels and users, Use screen designers, testing integrations and widgets and publish content, is free.
You may even create OMNIplay (software) trial licenses for testing for a limited time to ensure it all works as you planned. To use DatabeatOMNI in production requires an active license, one per player. Depending on the required functionality and acceptable cost, select OMNI, OMNI +, or OMNIpro.
When you have completed all the above mentioning steps, you are all set to go. Should you have any issues during the process, contact our support team, they will guide you through and fix any problems or challenges that you may have.

