
Where
In DatabeatOMNI pro. Select Tab [Location]

At the bottom of the info panel on the right side locate the Calendar icon 
It can be a grey/white simple calendar icon when not connected and ie an Office icon when connected.
Click on it to configure the calendar properties
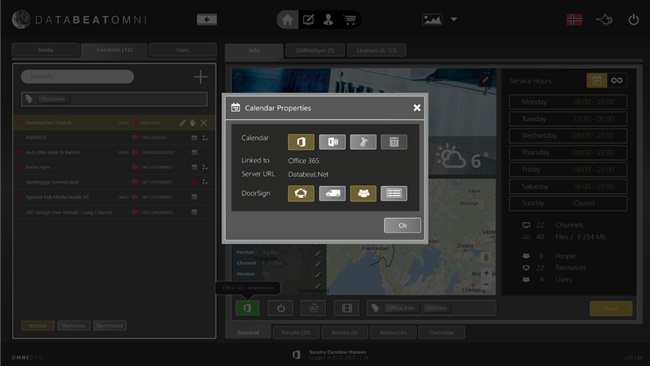
Setting Calendar Properties
First Select Which calendar to connect to, icons left to right (with Tooltips) and configure the selected integration. (click on the respective to learn how to configure).
- Office 365
- Exchange 2016
- Exchange 2013
- Google Calendar
Select resource-group to make Doorsigns for (Rooms, Equipment, Users and Overview). Press OK
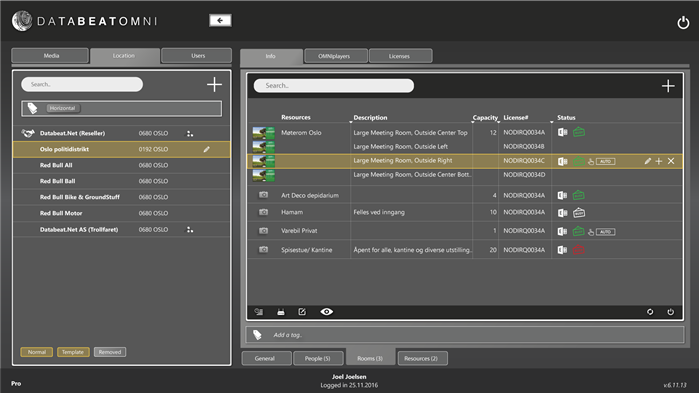
You will see Tabs below that reflects your selection (Rooms, Equipment, Users and Overview).

These do not yet contain any resources form your calendar system. You will have to search, find and select which resources/users you want to display.
Search and add resource or user to use with Doorsign or overview
Select the tab in which you want to add a resource, ie [Rooms]. Click on the top right side + to search add and resource(s) to use.
This will open the "New Doorsign" UI where you may search and select resource or user to add.
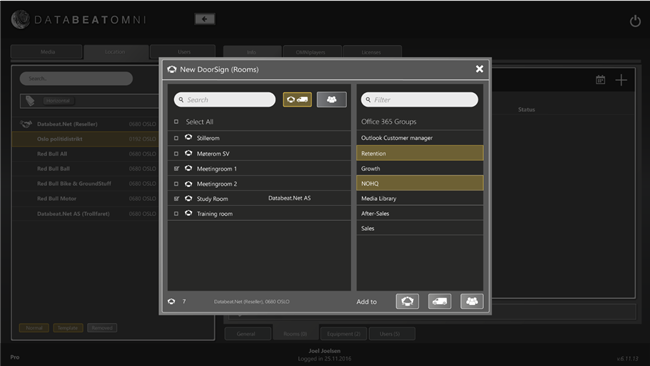
From the list of available Resources or Users, Enable the checkmarks in front of each selection, and press the respective icon bottom left (ie rooms or equipment).
Note: Microsoft API does not allow to search and select form rooms or equipment, but only separate between Resources (Rooms and Equipment) and Users. Therefore, users must manually place the resource or user in the correct tab.
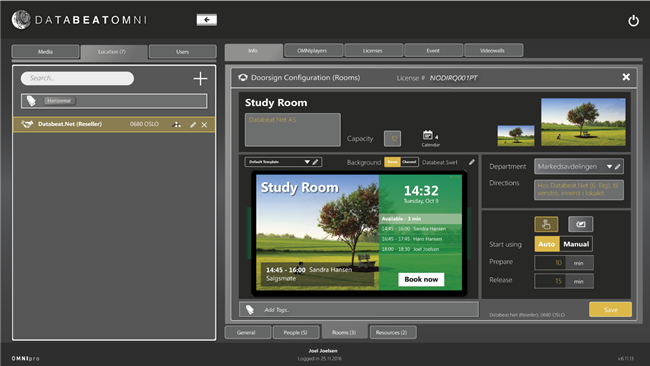
Configure Doorsign
Once resource(s) or user(s) has been selected. You may add one or more Doorsigns to them.
Click on the selected Resouce or user, and it will highlight. Click the + to add a Doorsign.
This will open up the Configure Doorsign UI. Here you can configure :
- Name and Description
- Capacity
- Calendar to use (some resources may, or not, have multiple calendars assigned to it).
- Graphics or Picture to use in the background
or - Channel to display in the background
- Which department the doorsign belongs to
- Directions (or any text) that can be added to the doorsign (in templates)
- Enable/Disable touch (ie for onscreen "Book now")
- If you want the Doorsign to automatically start and end meeting (switch to red) or to force meetrom- users to do so manually. and times before (prepare) and after the doorsign will display busy status.
- Eco mode, If you want to Doorsign to follow the Service hours defined on the Location.
Click Save to save and exit.