Three Rooms and a minivan are made available for external booking with DATABEATdoorsign.
NOTE: DATABEATbooking is a new product that extends the use cases of our DATABEATdoorsign product a step further into multi-tenant booking. We are, as always, still developing many useful features based on your feedback. Your product feedback is well appreciated and likely to affect our development priorities.
What is DATABEATbooking?
Many organisations have resources (Rooms, Resources, Users) available for external tenants, customers, or clients. It can be shared meeting rooms, office desks, a service, minivan, or a conference room partially available. Any of these can easily be added to Microsoft 365 - as a room, resource or user - and allow it to be searched for availability and booked. The problem is that only an organisations' own users can do that.
DATABEATbooking is a multitenant booking solution that allows organisations to quickly set up an online reservation site for anyone, external and internal users. It uses the Microsoft 365 calendars which allows internal users to the new site or to still use their existing system, ie Outlook. DATABEATbooking allows customers to decide which and when resources are to be available, whom to have access to the booking site, and if authentication is required. Even multiple locations can be managed.
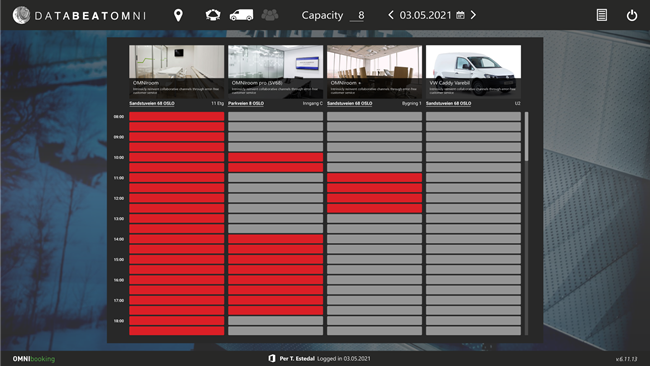
DATABEATbooking admin UI shows booking status on resources across multiple locations.
What do I need to get started with DATABEATbooking?
- A Microsoft 365 account with the required resources.
- A DatabeatOMNI account linked to your Microsoft 365 user. It's free, sign up here.
DatabeatOMNI is a Screen Publishing platform hosted on Microsoft Azure, the engine behind DATABEATbooking, DATABEATdoorsign, and DATABEATsignage. This allows these applications to share a common infrastructure, such as the link to Microsoft 365 users and resources, locations, and media.
- Link DatabeatOMNI to your Microsoft 365 account
NB! For DATABEATbooking to work, it needs to communicate with your company's Microsoft 365 account directly. This requires that you have the necessary credentials to allow the necessary access rights. Talk to your Microsoft 365 administrator if you don't.
NOTE: Before granting access, Microsoft provides a detailed list of the requested rights. Read them carefully, and observe the difference between delegated and application permissions. Delegated means that requests are made on behalf of the signed-in user, a right we prefer to increase the overall security. You can read more here.
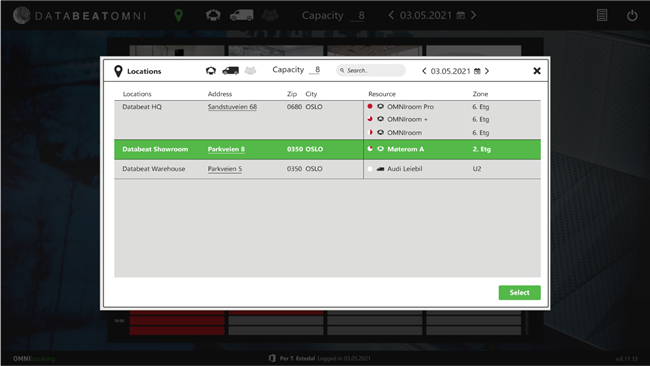
- The relevant location(s) (name, address etc) added in DatabeatOMNI
- Add and group the relevant Microsoft 365 resources to the Locations in DatabeatOMNI.
Microsoft 365 separates between rooms/resources and users. DatabeatOMNI allows you to separate between rooms, resources and users.
In DatabeatOMNI each location has tabs with different resource types. - Enable the relevant resources for DATABEATbooking. (see here).
What is the Difference between DATABEATdoorsign and DATABEATbooking.
DATABEATdoorsign is media player software installed on compatible screens to display the live status of a Microsoft 365 resource, check-in book onsite etc. It can represent a single resource, ie an outside digital Doorsign, on a screen in meetings rooms, on way-finding screens or overview screens. DATABEATbooking includes DATABEATdoorsign, but also allow customers to set up a multitenant booking site to allow external users.
How to access and start using DATABEATbooking?
A 3-step process is required to start using DATABEATbooking:
1 Set up DATABEATomni:
- Sign-Up, preferably using your Office 365 login.
- Adding customer detail and contact info
- If necessary, add more users and location(s)
2 Set up DATABEATdoorsign:
- Link to the Microsoft 365 account (as described above)
- Add and group Microsoft resources (as described above)
3 Set up DATABEATbooking
- Enable "share with booking" for each resource to be used for DATABEATbooking.
When DATABEATbooking is enabled a new Calendar Share icon will appear top right in your DATABEATomni user interface. Click on in to access DATABEATbooking for the final setup and launching your own booking page.
- Design How the UI is to be for your tenants (and yourself)
- General Settings. Specific rules and settings for your DATABEATbooking site
DATABEATbooking design
The design that you will see, is similar to what your tenants will see. As an Owner, you may also use the UI to book, the same way as Tenants. The only difference is that you will have access to options to design or select a template for the layout and to set/change General settings.
DATABEATbooking allows you to design the Tenants layout in two ways;
- By creating a custom template. This is for front end designers/developers. Allow them to use access and use the template editor available in the header combo.
- By a simple graphical interface. Here you have somewhat more limited options, you may choose (top to bottom, left to right):
- Top left image or logo to show
- The header colour and opacity (more or less transparent)
- The background picture/graphics
- An overlay to cover the background picture (to make the UI more visible), its colour and opacity
- the UI overlay and its colour and opacity
- Show available time as busy (red) or free (Green) and secondary colour and opacity. More info here
- The footer colour and opacity (more or less transparent)
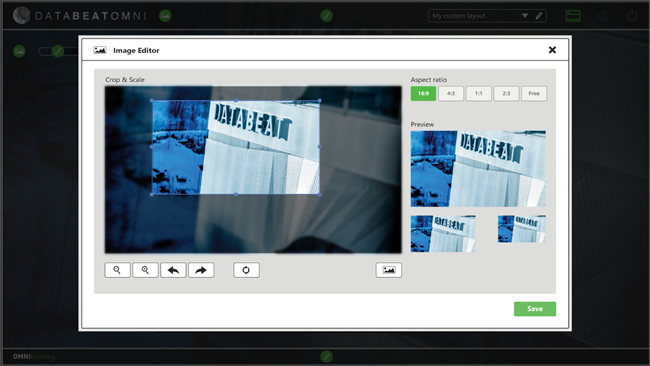
Below: Main UI for various settings.
Centre: Image editor to add and crop and scale, ie the background image
Bottom: UI to set the colour and opacity (bottom slider)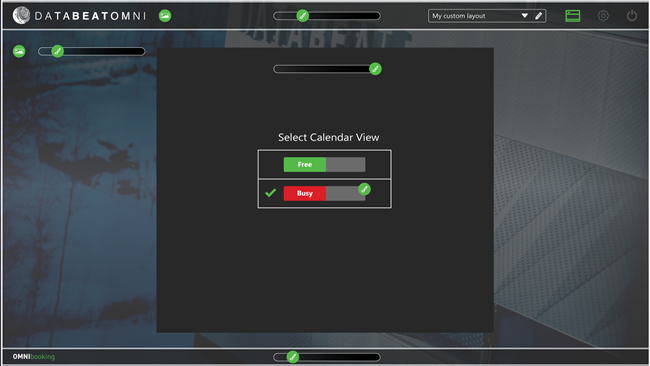

DATABEATbooking General Settings.
In the header, click the configuration cog-wheel icon to access the General Settings.
- Available for all. If you want everybody to access and book your available resources, or if you want specific tenants to have access. (To be selected by domain or email address).
- Require Login. Regardless of your initial setting, this will require users to log in with a third-party authenticator (Microsoft Office, Google G-Suite, Apple, Facebook, Microsoft, Google or Amazon). (we recommend you enable this).
- SMS verification. This will require users to provide their cell phone number so that you can require them to verify themselves with SMS (two-factor authentication).
- Add email or domain. If you opted not available for all, add specific domains or email address that is allowed to book.
- Subdomain. DATABEATbooking is available on [subdomain].databeatbooking.net. Choose your subdomain, ie yourname. This will then be your DATABEATbooking web address;
htttps://yourname.databeatbooking.net . Your booking site can be accessed directly by typing this in your browser, or you can add it with a link on your own website.
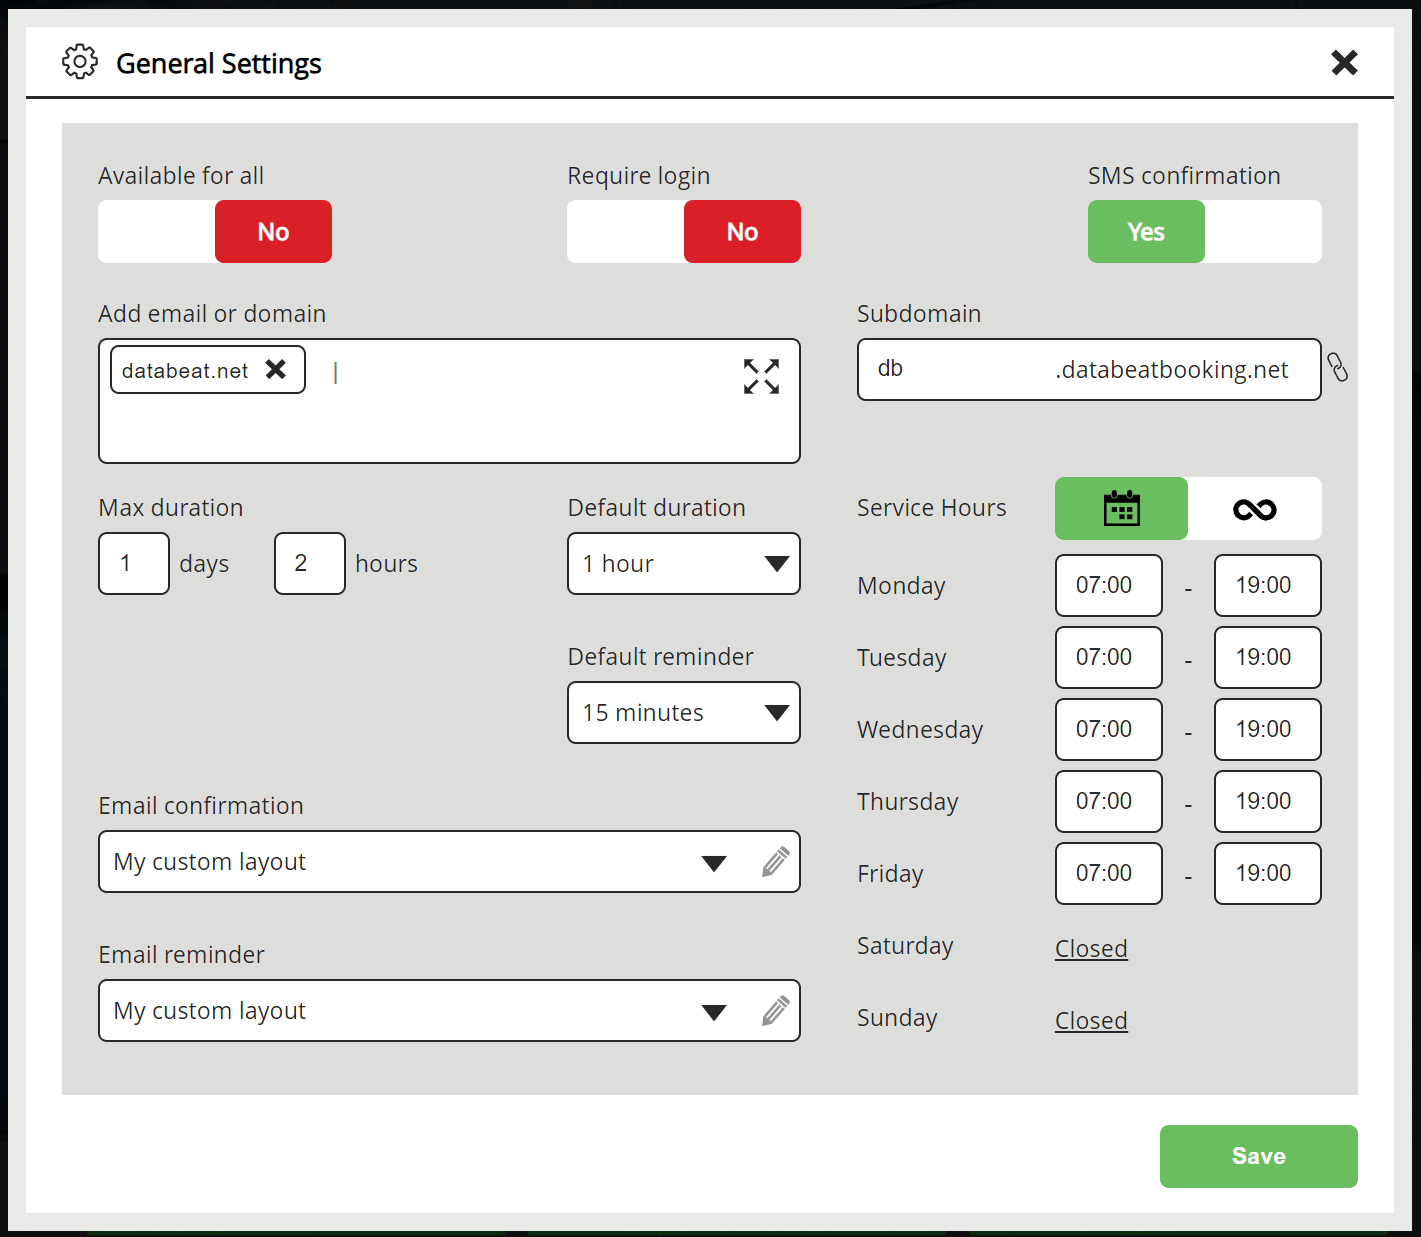
- Max Duration. For how long can your tenants book any resource (max days and hours)
- Default Duration A default value for the length of a booking (user can change)
- Default Reminder A default value for booking reminders (to tenants)
- E-mail Confirmation. To select, and create templates for E-mail confirmations
- E-mail Reminder. To select, and create templates for E-mail confirmations
- Available weekdays and hours. To select days and hours, when the Office365 resources are available to be booked.
Q & A
Does DATABEATbooking work with Google G-Suite?
Not in its current release. But if demand is there we plan to support Google G-Suite with future releases.
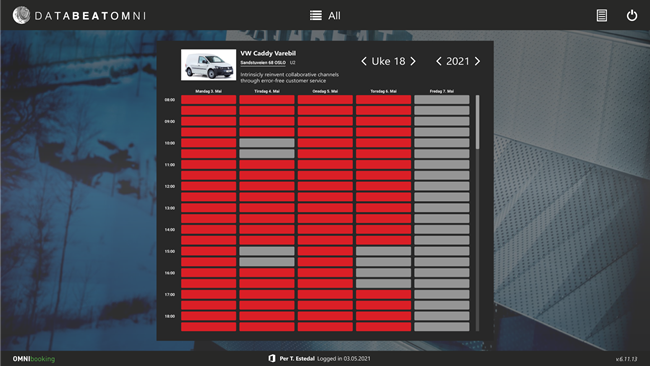
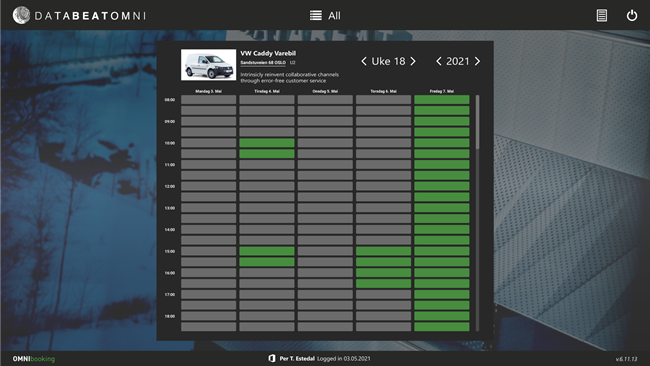
What is the difference between the Red and Green Layout ?
There are two opposite Tenant views to choose between (examples below):
- Focus on the busy hours (red). Tenant must click on the non-red colour to select available.
- Focus on the available hours (green). Tenant must click on the green to select available.