

The article is available in multiple languages. Select language at the top of the page.
Content in the article
Preparation
To install and configure an OMNIplay3 you will need the following:
- A screen with HDMI input
- HDMI cable
- Power adapter
- OMNIplay3 remote control or USB mouse/keyboard
- Network connectivity
- License key or PlayerID
The installation will take between 1-4 minutes to complete. Using a USB mouse and keyboard will probably help reduce installation and configuration time.
Installation & Configuration
Connect the OMNIplay3 media player with a power source and HDMI cable to a screen.
Under the box, there will be weak blue light if OMNIplay3 obtains power.
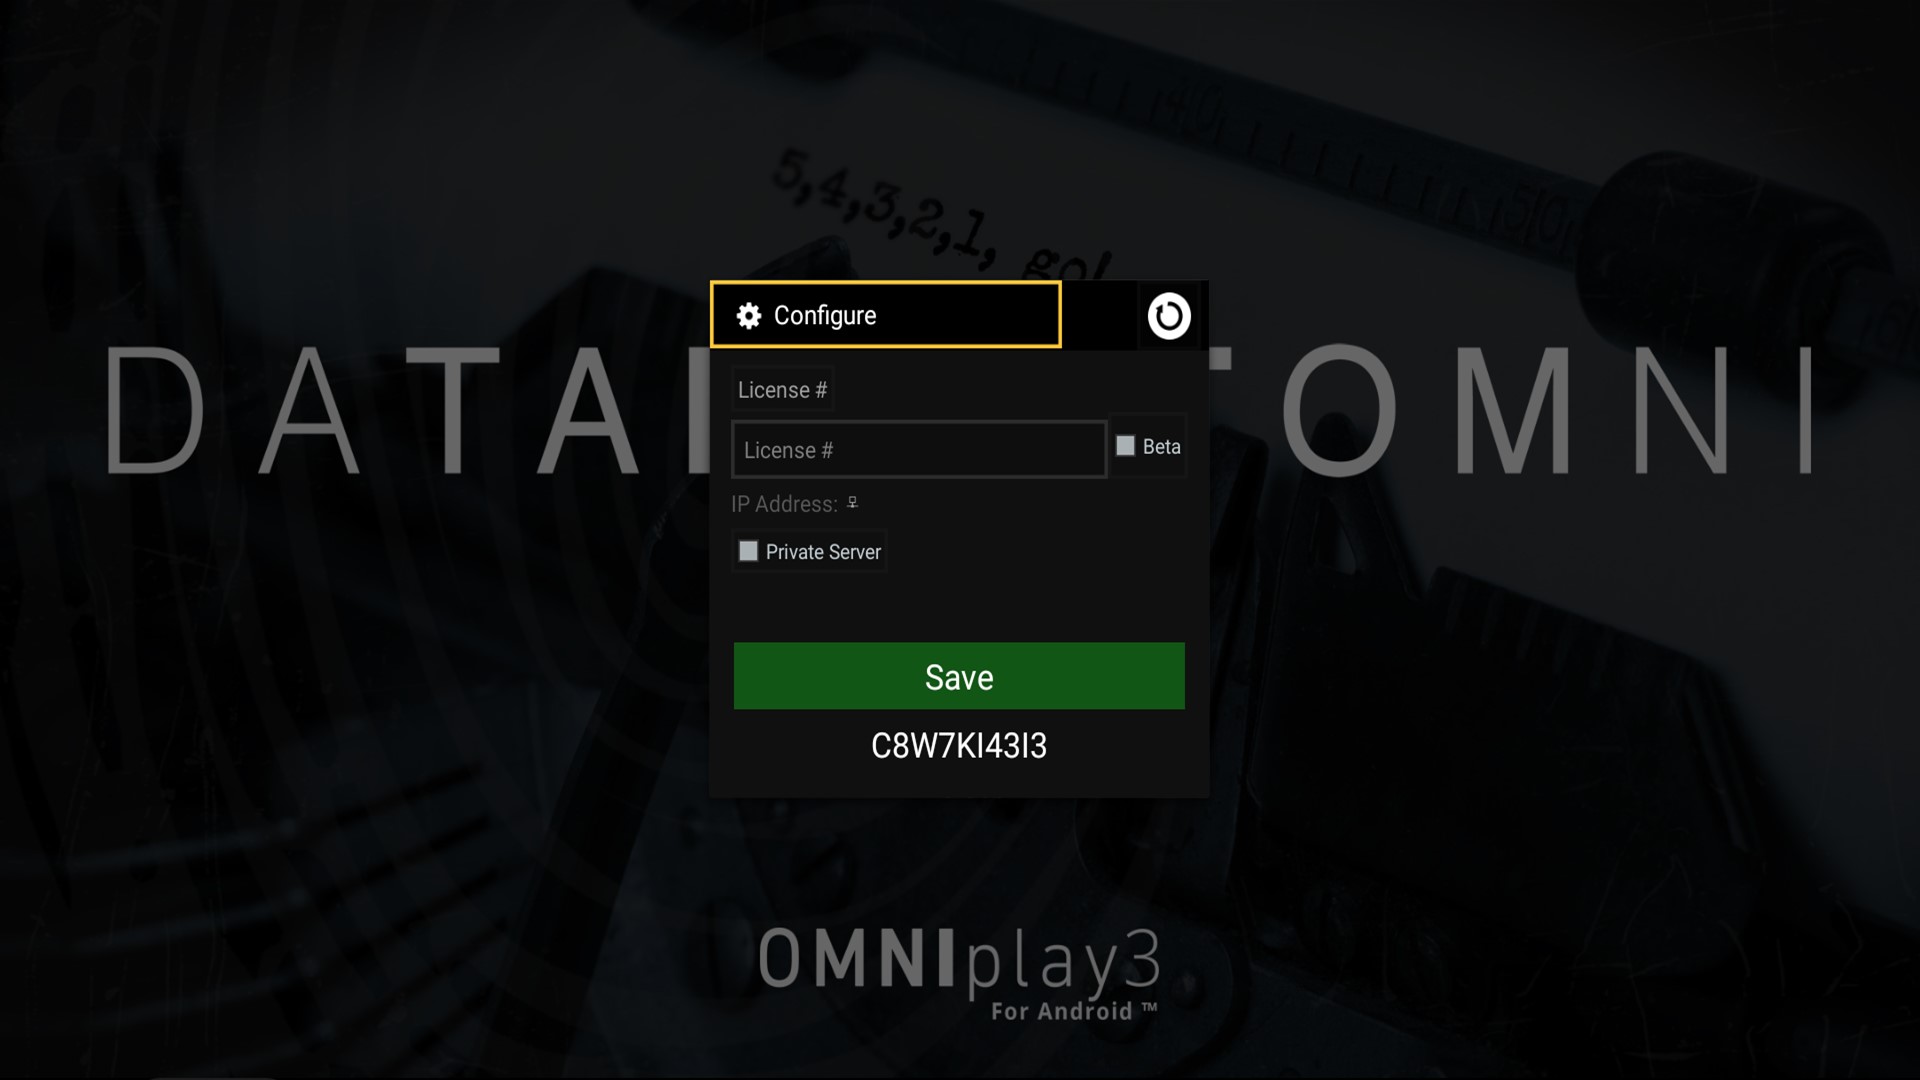
Change the input of the screen to the HDMI input you connected the OMNIplay3 to with an HDMI cable. Below, is the first screen image that you will see.
Using Private Server?
Check the box for Private Server and enter your details.
The first thing you do is to go to Settings.
• Click on Configure as shown in the image above. (Double click if using USB mouse)
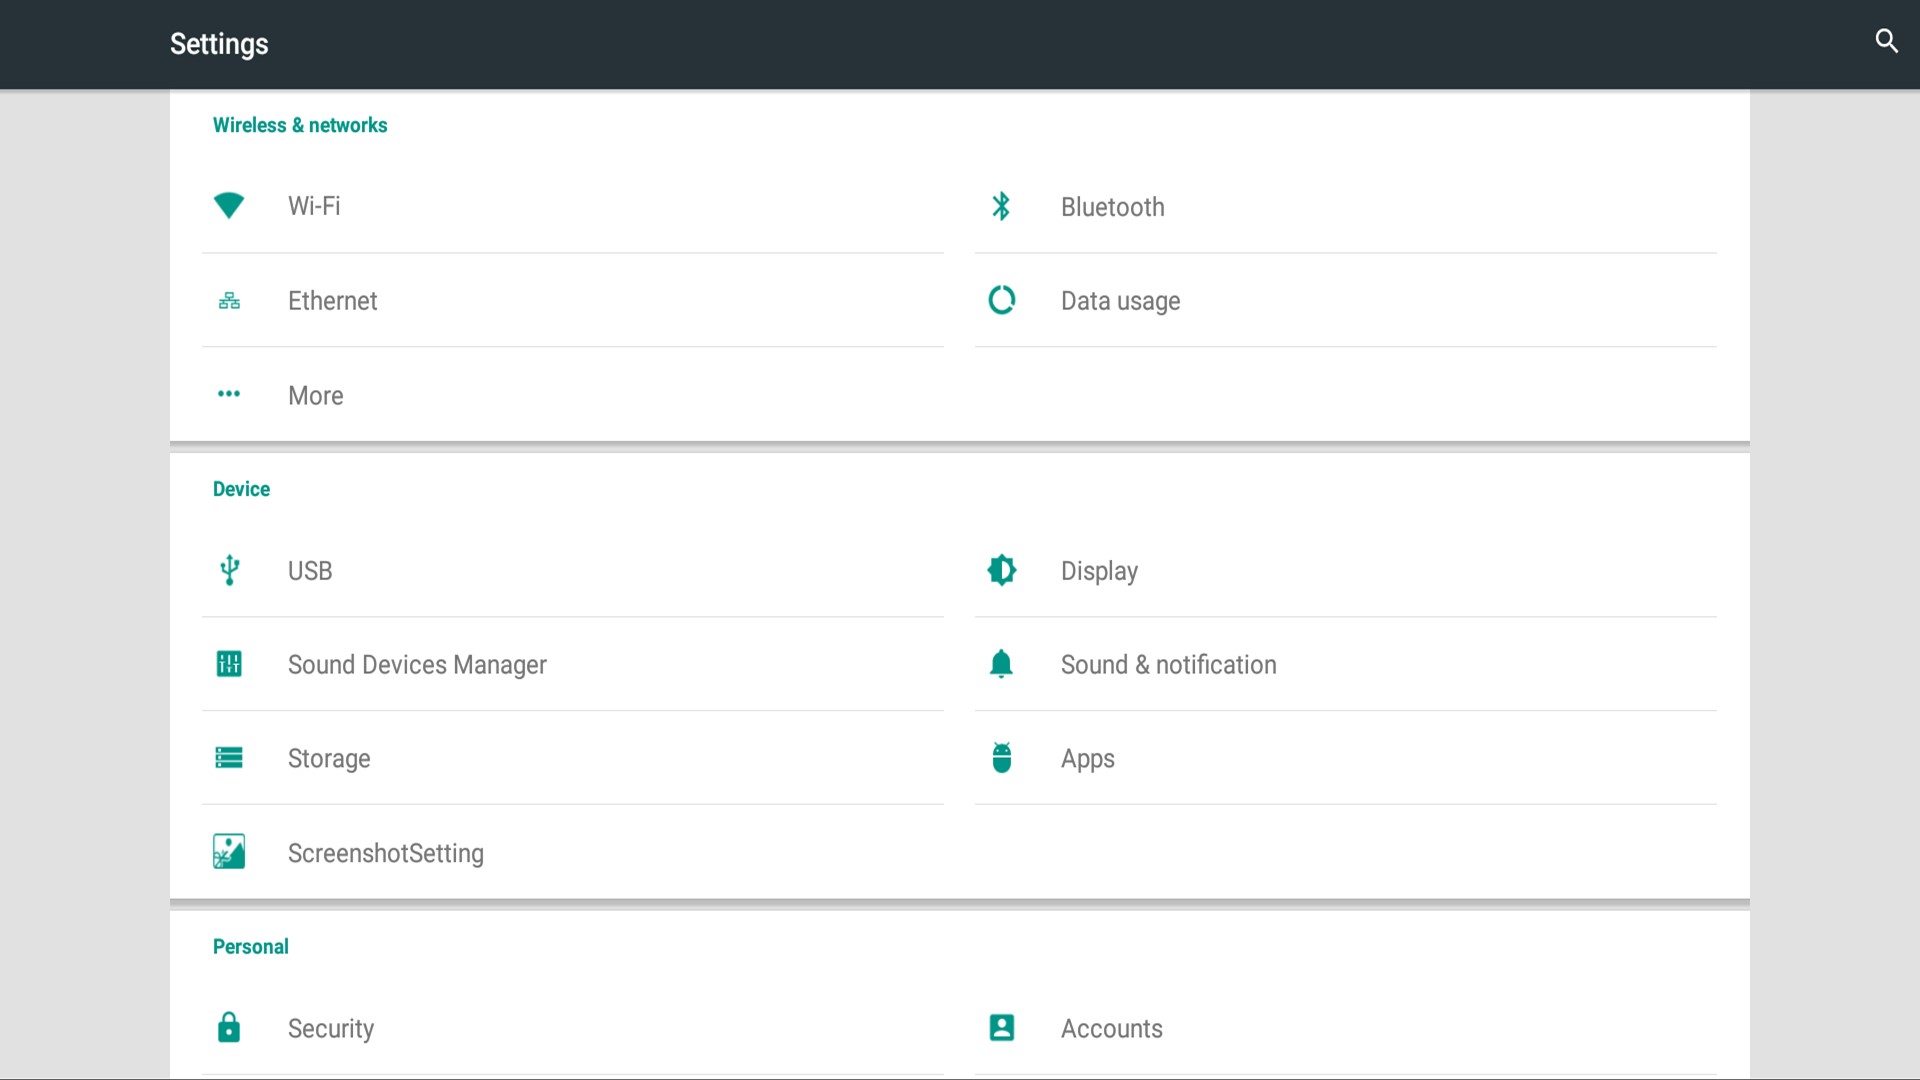
In Settings, you will have access to control and to limit a series of features. In Settings, there are two stages that need to be completed.
Step 1: How to connect the OMNIplayer3 to a network
The OMNIplay3 supports both wired and wireless network connectivity.
• Wired connection
We recommend connecting the OMNIplay3 with a wired connection due to greater network stability. With this alternative, simply connect the RJ45 networking cable directly in the OMNIplay3. Please double-check that the ethernet setting is enabled and connection is working.
• Wireless connection
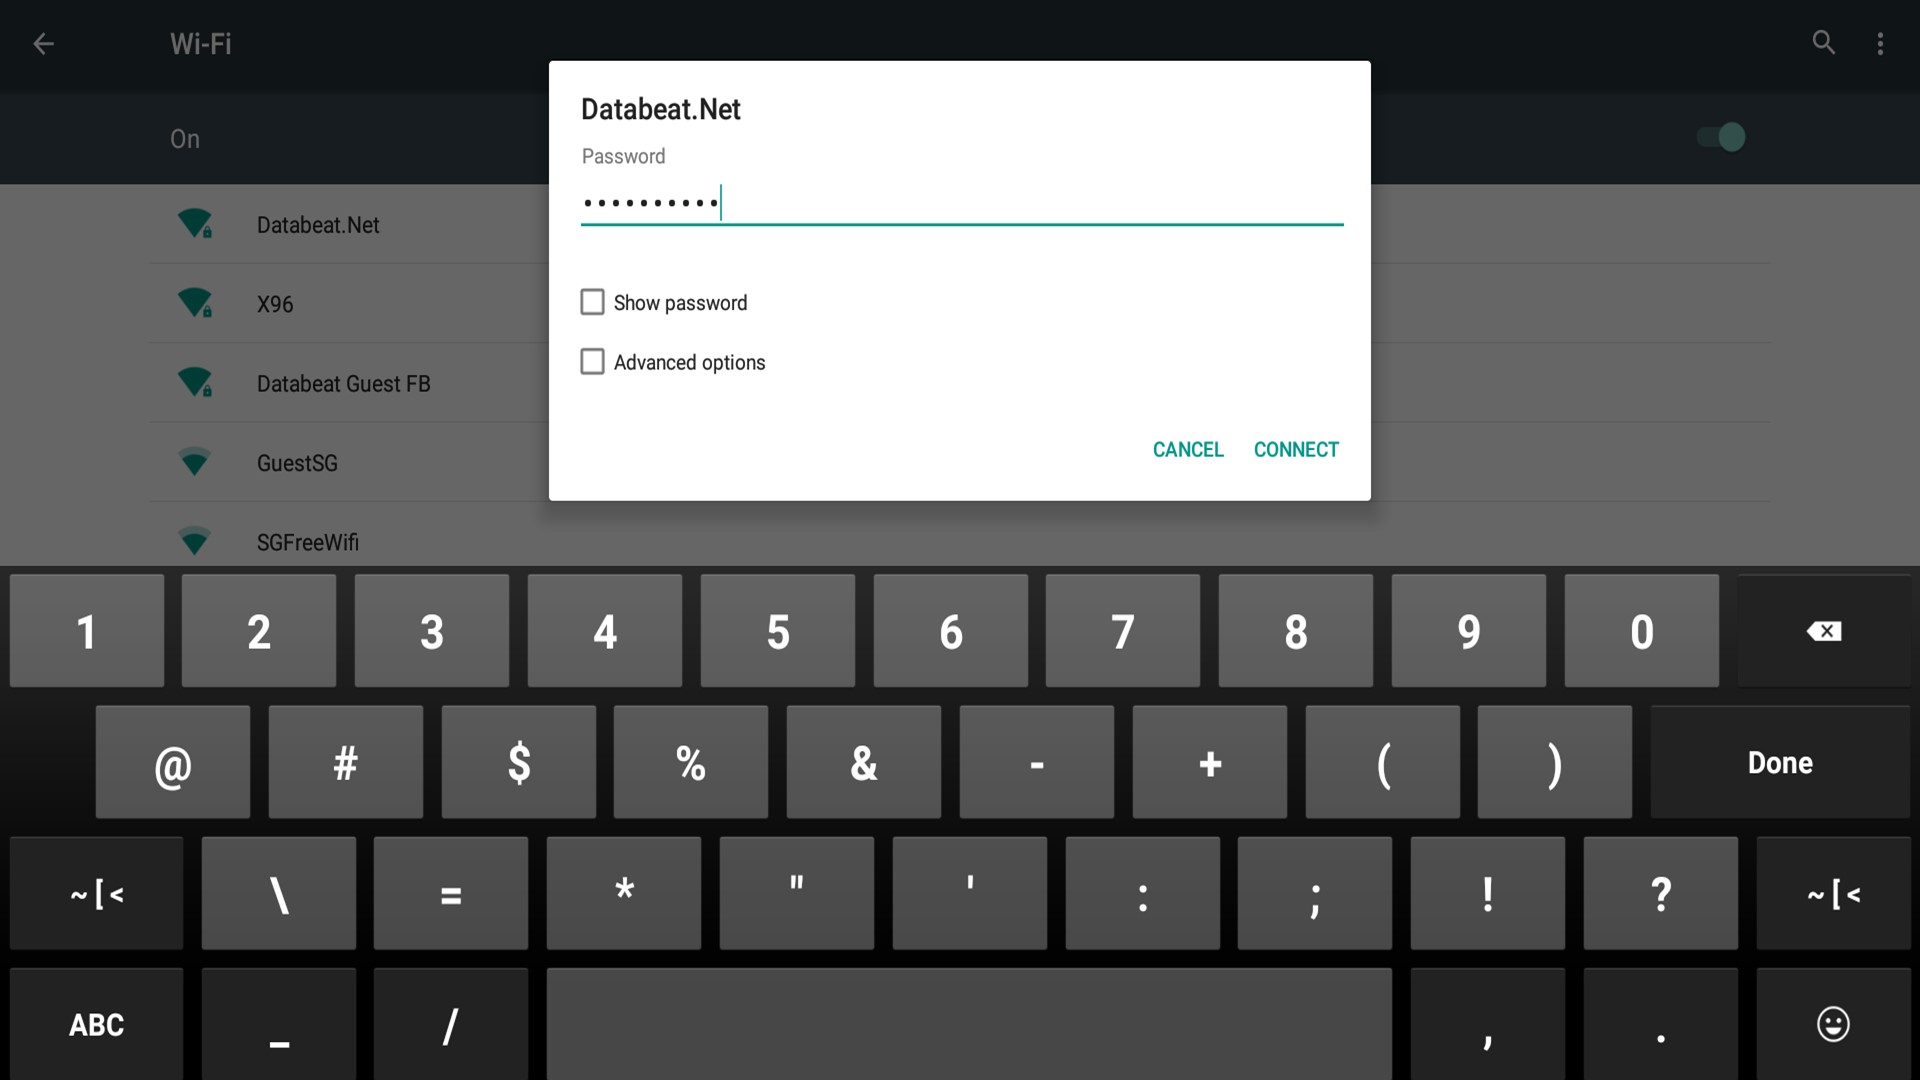
Under the Wireless & networks category, you will find the settings for Wi-Fi.
1. Click on Wi-Fi and enable Wi-Fi in the top right corner. A list of available networks appears.
If no list of networks appear, please ensure that Wi-Fi is On and that the OMNIplay3 device is in within range of the router/access point you are trying to connect. A radio button in the top right corner will indicate if Wi-Fi is Off (Grey) or On (Green).
2. Select your network, enter the password, and connect.
Click Advanced options if you need to setup a Proxy or specific IP settings.
3. Verify that you are connected to your network and go back to the Settings menu by clicking the return arrow or right-click once if using a USB mouse.
NB! Application update may install automatically.
The update may begin automatically in the background after you connect to a network and your device will restart after installing it. After the restart and to complete the update you may be prompted with a message where you need click to Decline (recommended) or Accept Google's device security settings.
You will only be prompted with this message once pr. device and if no answer is given then OMNIplay3 will retry the update again, so do it quickly!
Step 2: How to activate OMNIplay3 as a device administrator
If your OMNIplay3 android device is version 7.1 this setting is automatically set, and Step 2 can be skipped.
To prevent an unwanted message to pop up on the screen and enable the software to update correctly after configuration, we must go into Security settings and ensure that OMNIplayer is a Device administrator.
- Click Security in the settings menu, under the category Personal.
- Click Device Administrators.
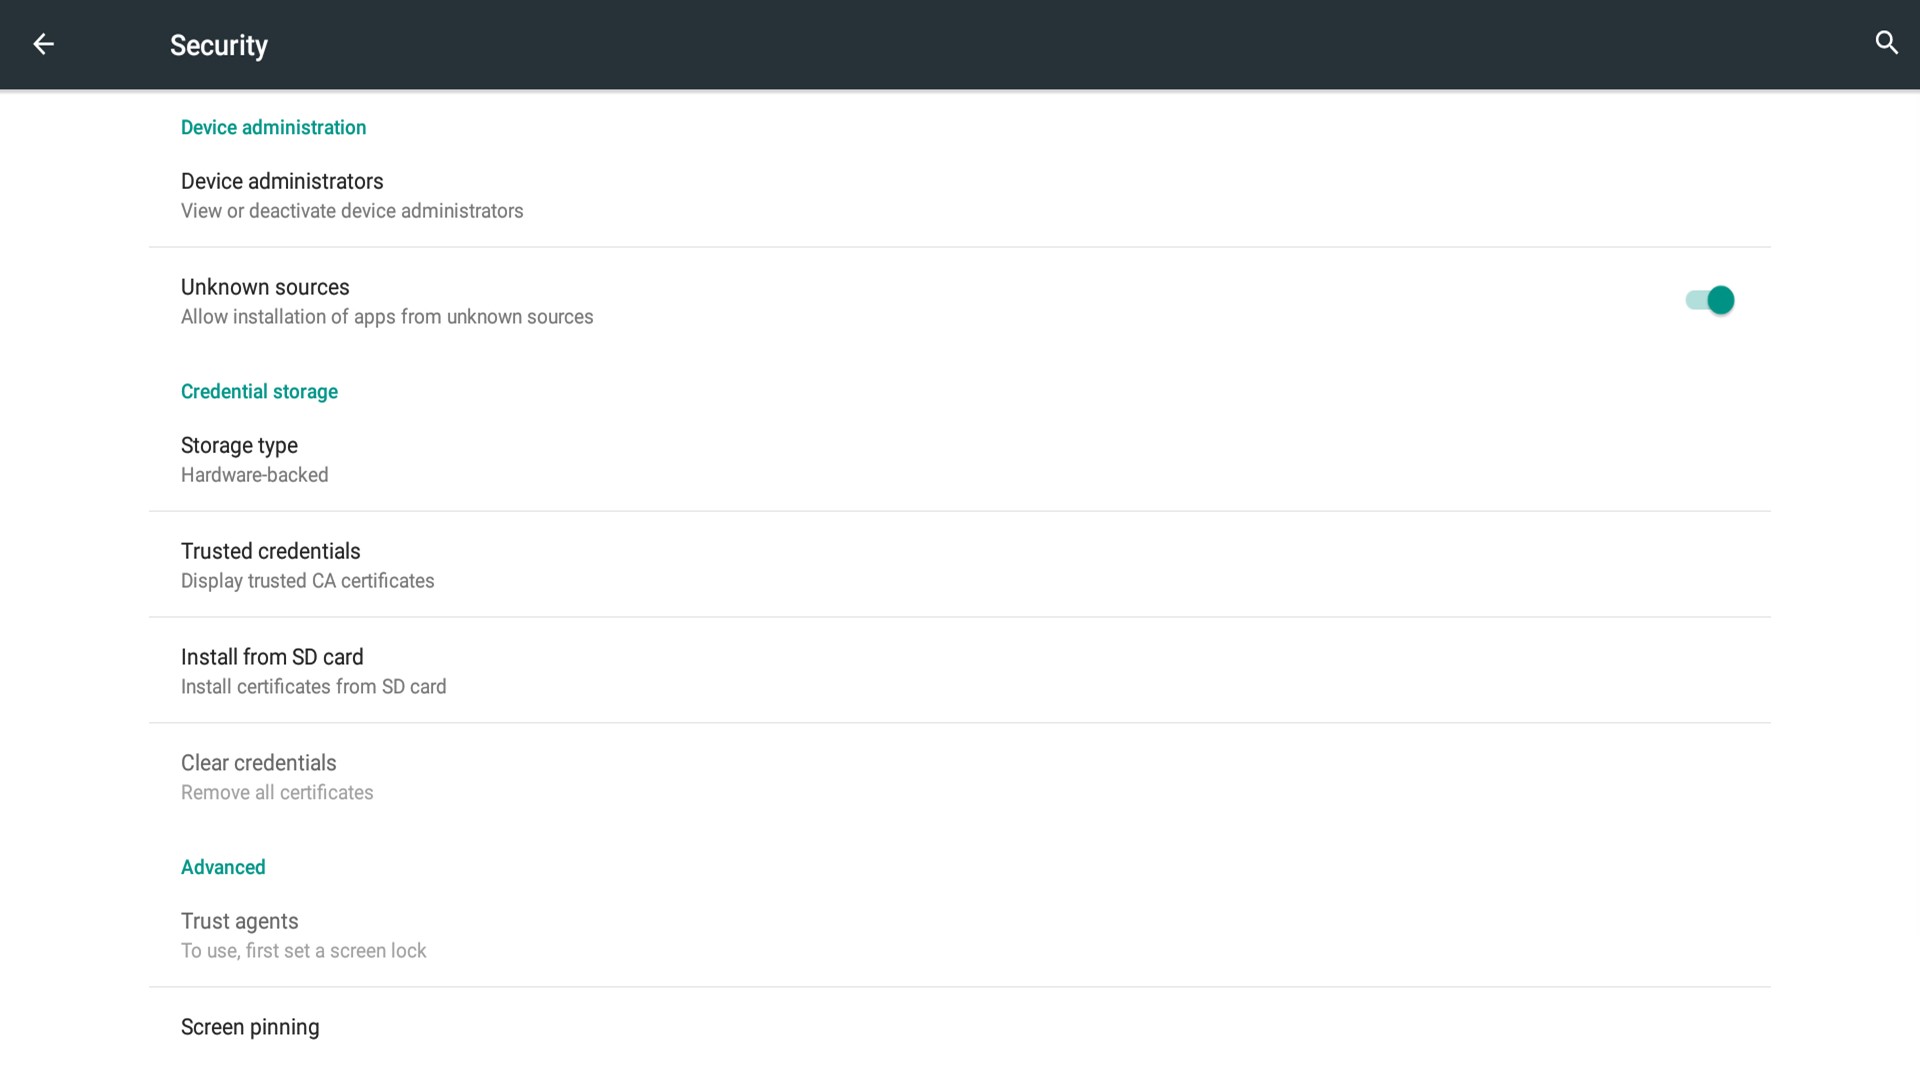
In Device administrator you must ensure that the checkbox for OMNIplayer is checked and active. If not then you need to activate:
- Click on the checkbox for OMNIplayer and choose Activate.
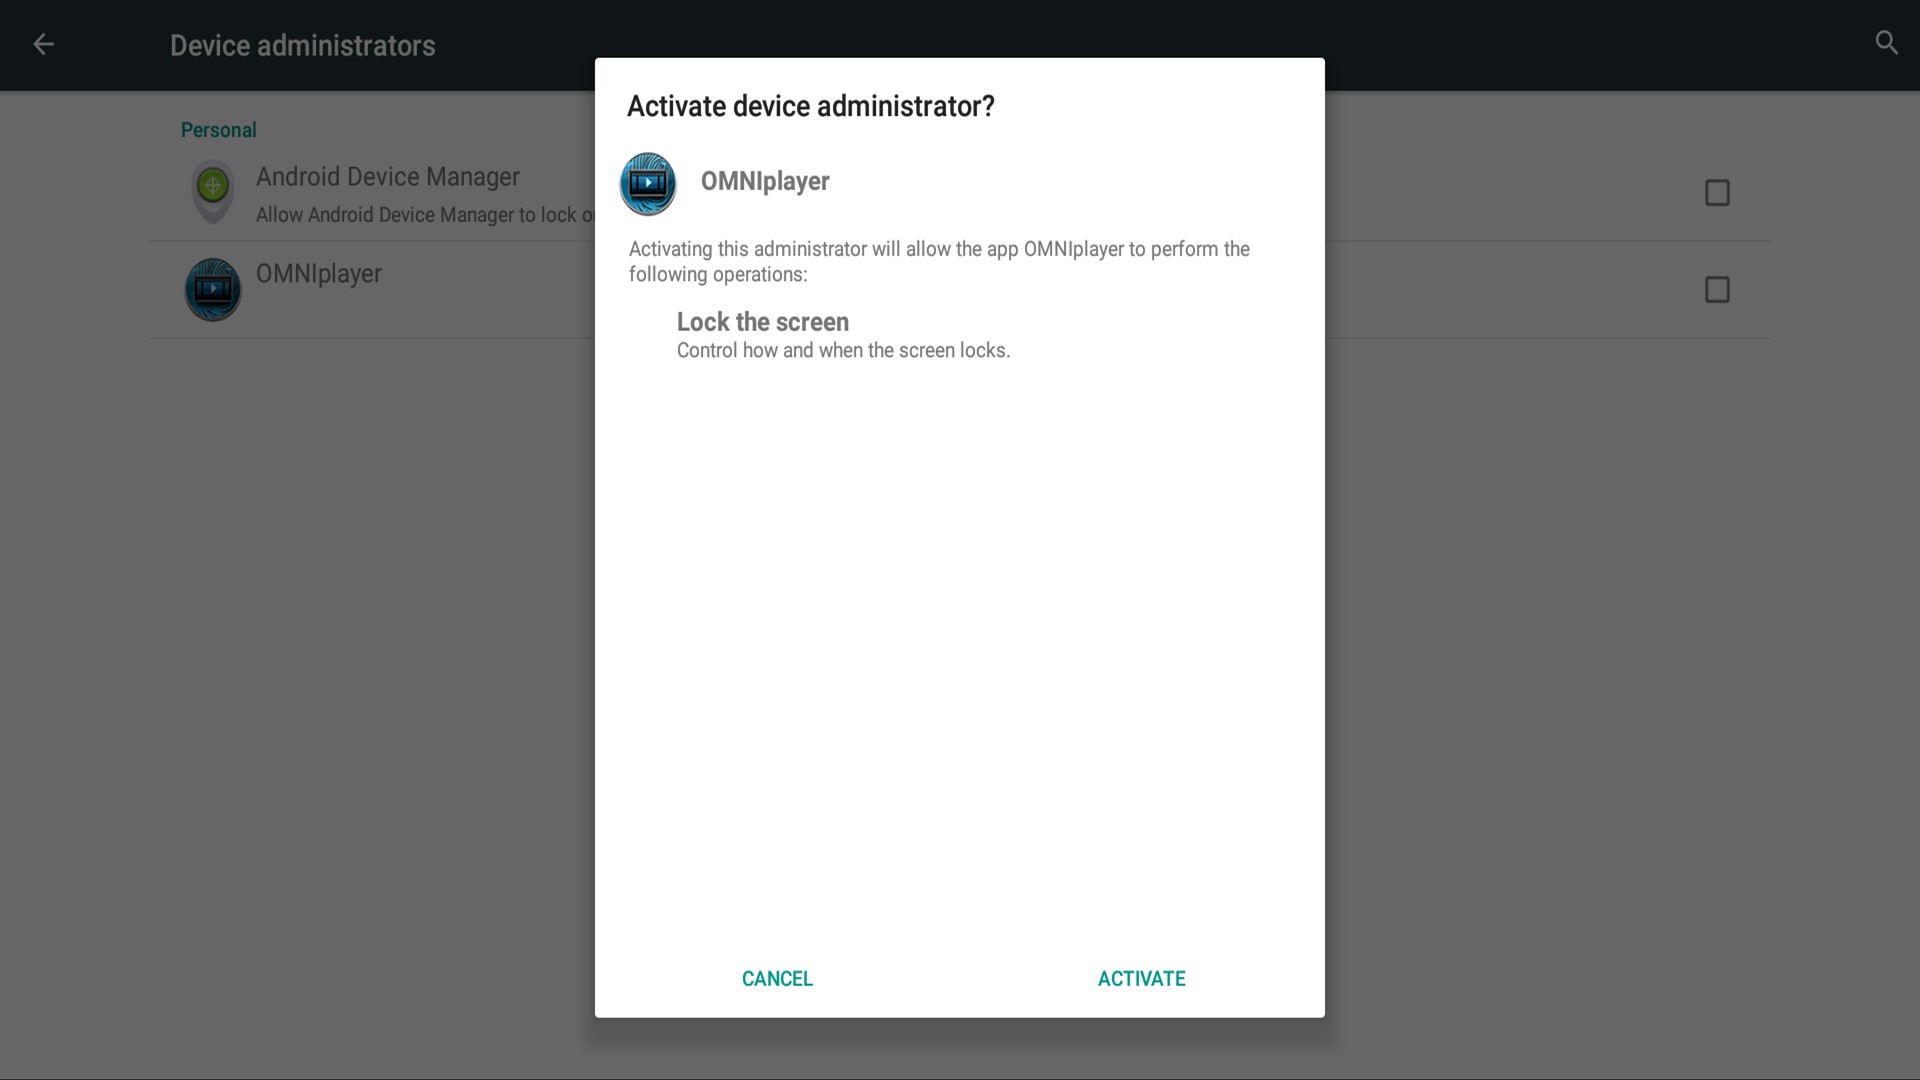
Right-click with the PC mouse to go back. From the image above, it will take 2 mouse clicks in order to go back to Settings menu.
Step 3: Set correct Date & Time and check display settings
Ensure that Automatic Date & Time and Automatic time zone settings are off.
- Go to the Settings menu and select Date & Time.
- Set Automatic date & time and Automatic timezone to off.
If radio button on the right side is grey, that means that it is off.
- Go back to the Settings menu and select Display
If your OMNIplay3 device has Android 7.1 the options will be unavailable and you can skip to Step 4.
-
Verify that the option Show the rotation button in the status bar is set to on.
-
Verify that Hide Statusbar is set to on.
-
Exit Settings and go back to the Configure page of the OMNIplay3.
Great! You are now done with the required settings. The OMNIplay3 device has a network connection, the app is activated as a Device administrator and has the correct Date & Time settings.
Step 4: How to configure the license key on OMNIplay3
To link an OMNIplay3 with your DatabeatOMNI account it requires a license key that must be activated on the OMNIplay3.
The license key is unique and can only be used with one single device. The license key usually consists of six letters, four numbers, and a final letter. Example: NOABCD0001A
You can find your active license keys or order new license keys in DatabeatOMNI.
-
Log in to your DatabeatOMNI account on www.databeat.net.
-
Click the Locations tab, select the location the OMNIplay3 should be linked to.
-
Click the OMNIplayers tab on the right and you will see all active license keys.
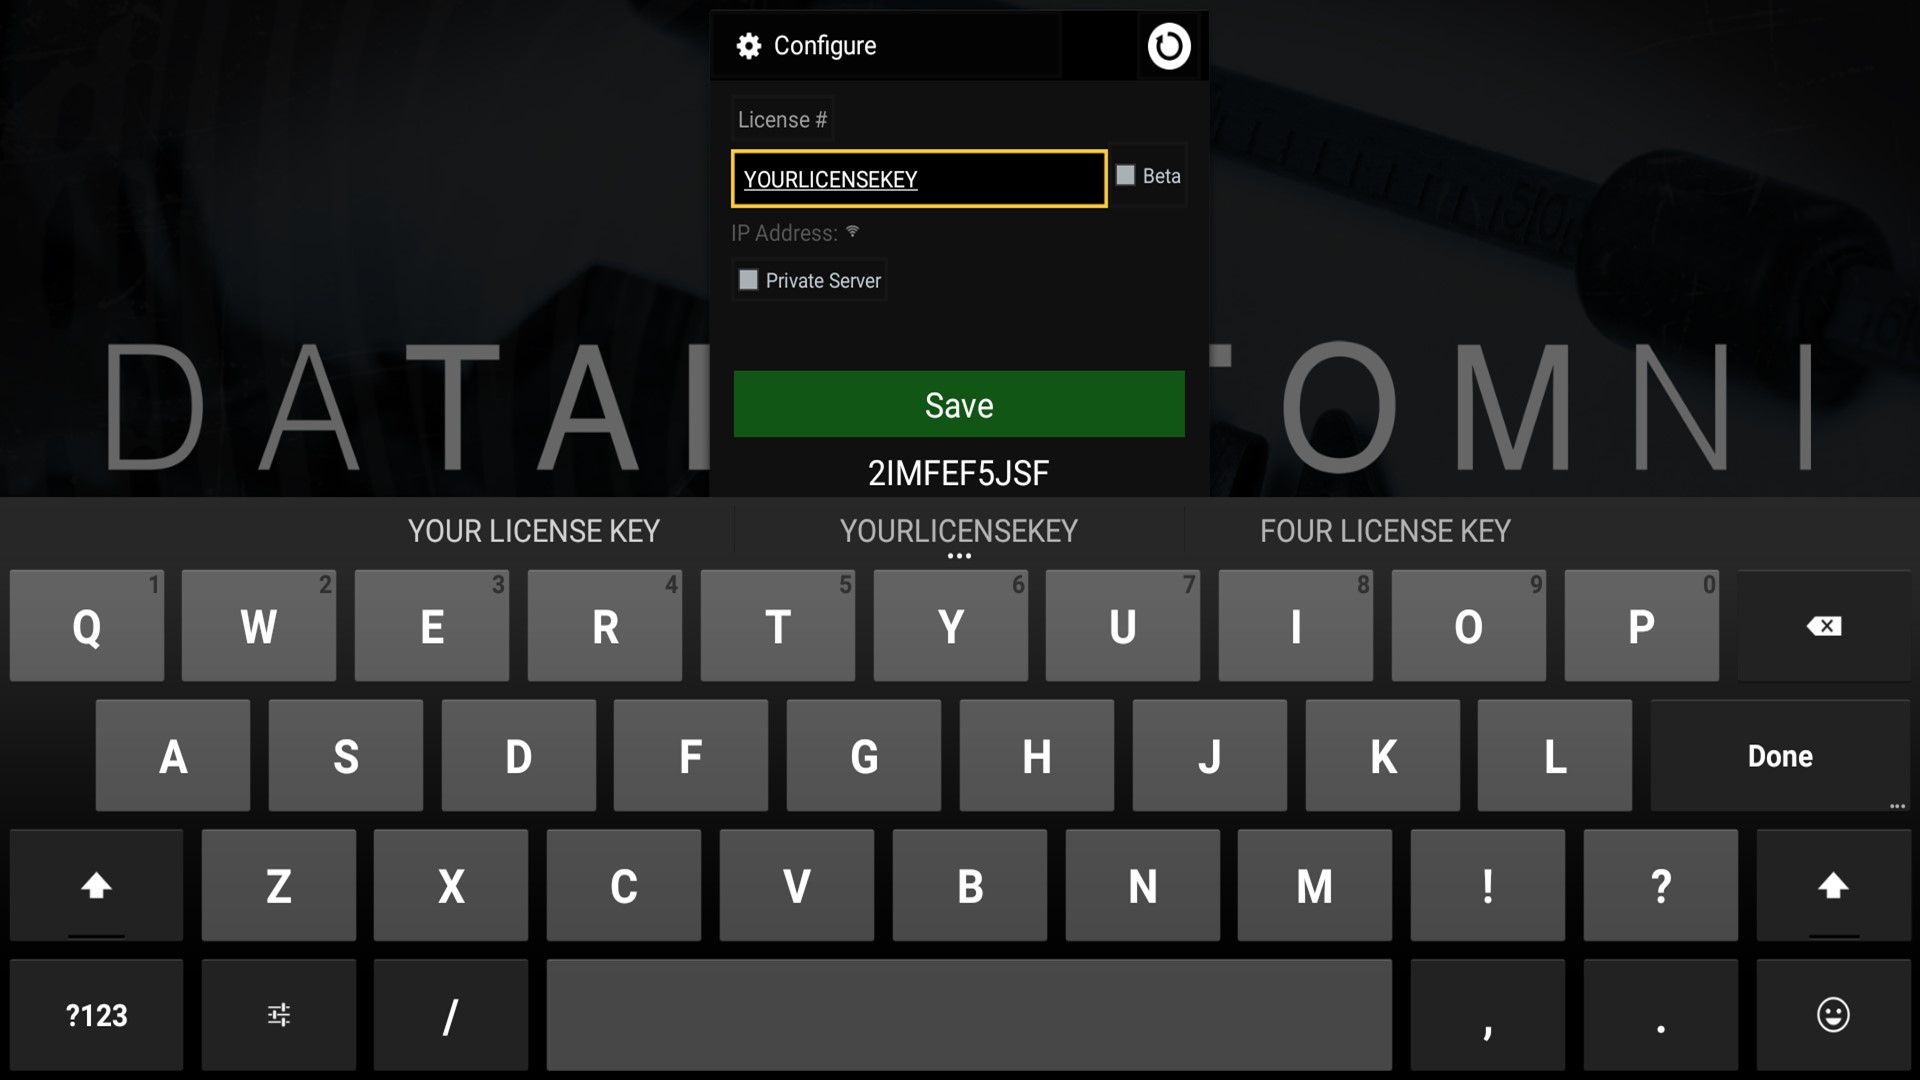
- Type in your license key and then click Save.
NB! Do not select Beta or Private Server
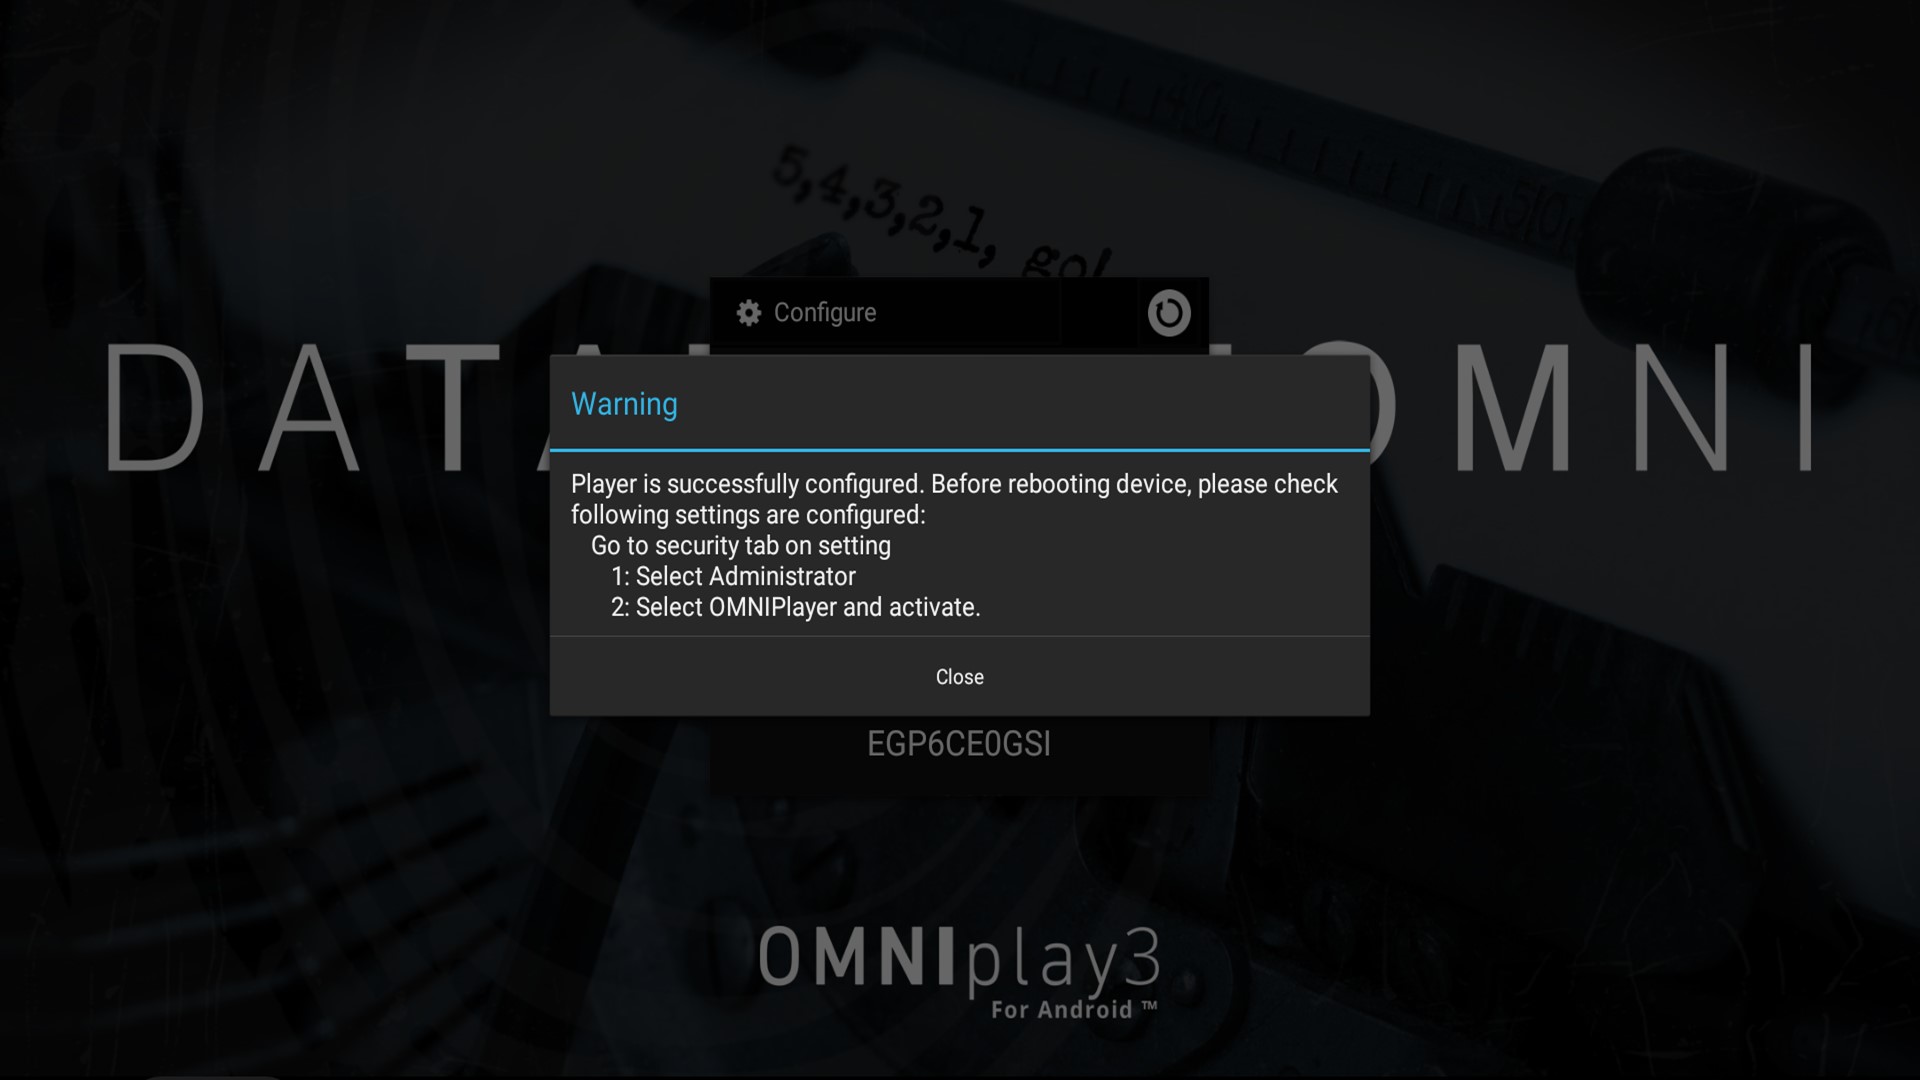
When you click Save, you will be notified to check Device administrator settings as pictured below. Since you already did this in step 2, you can click Close.
- Click the Restart button and click OK to confirm restart.
Restart button is the circular arrow icon as pictured below
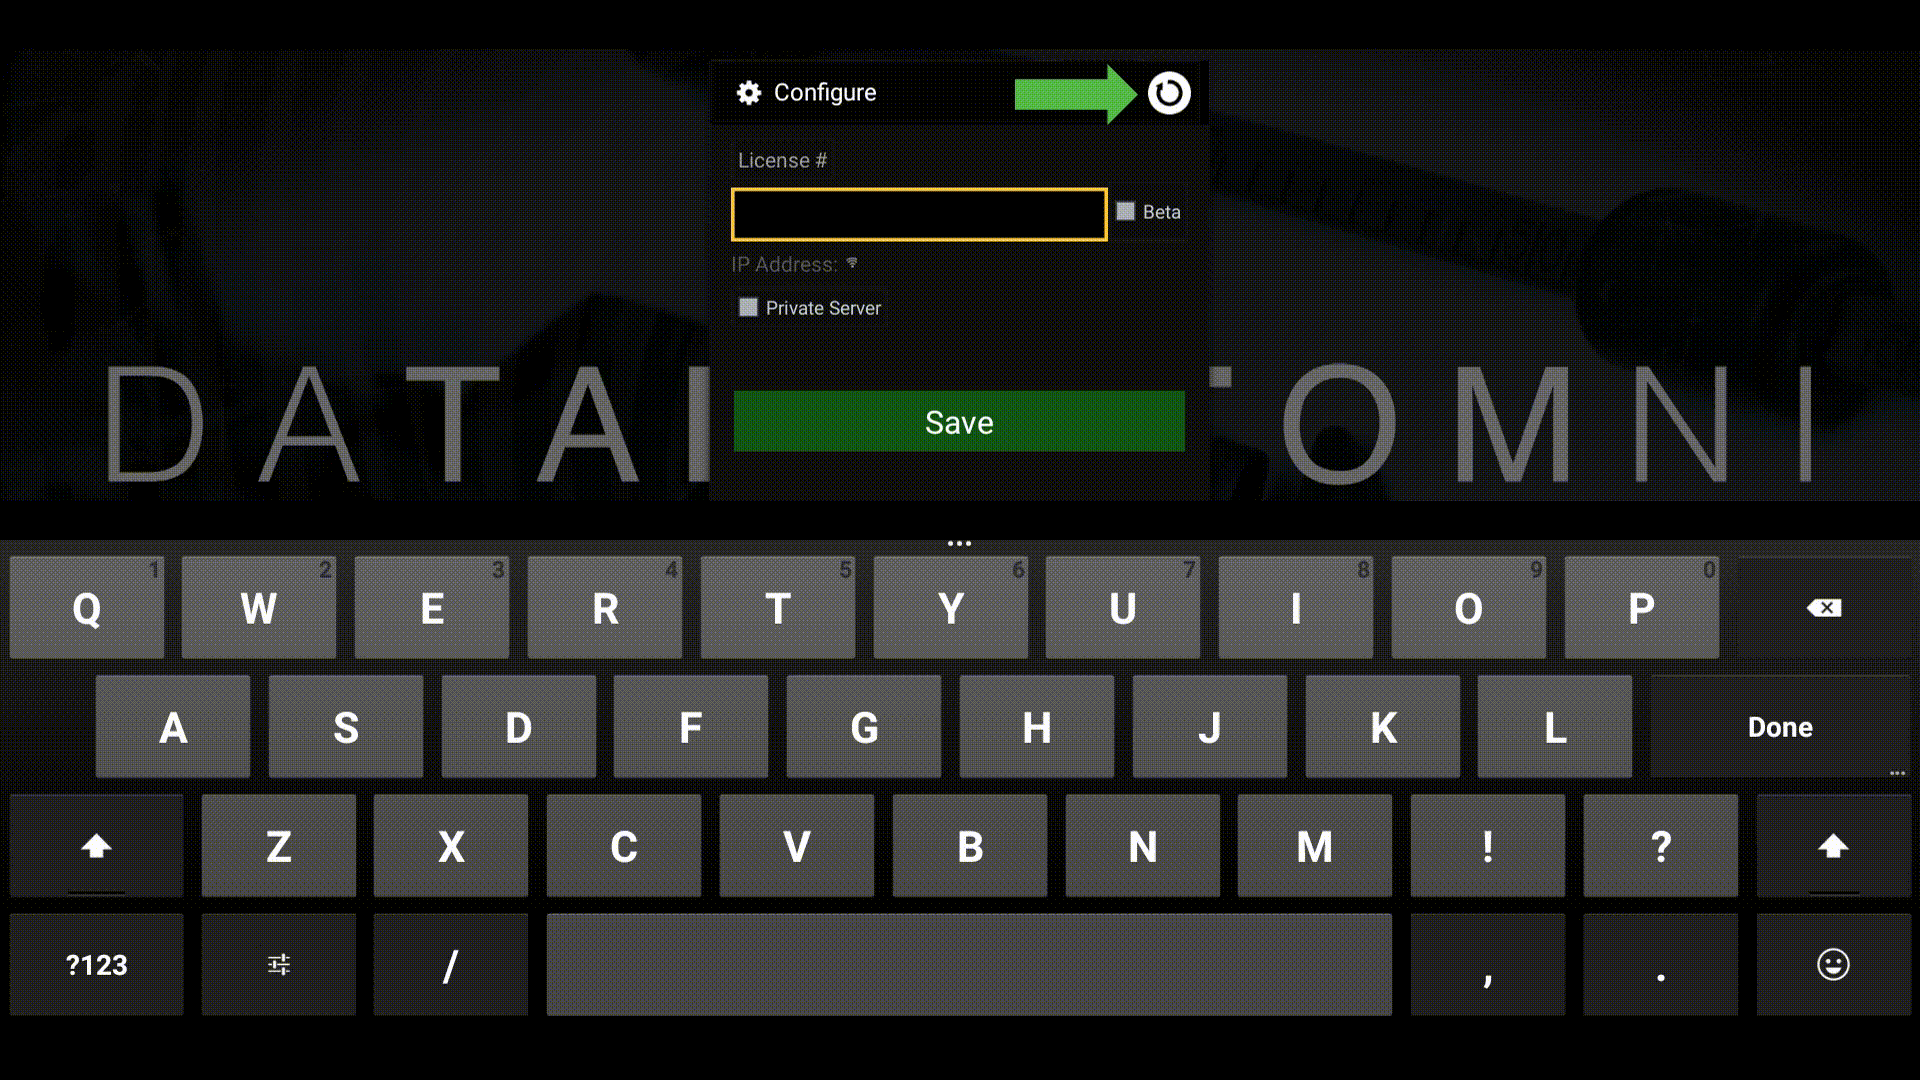
Configuration is now complete!
The OMNIplay3 will now restart and download the set configuration from DatabeatOMNI. The content in the subscribed channel will need some time to download first and then play automatically. The time needed depends on the content in the channel and network speed.

You can use the OMNIplay3 remote control or log into DatabeatOMNI in order to administer and control what type of content that will be shown on the screen. Or check our related article on how to administer and change a channel on the OMNIplay3.